Hi everyone, and welcome to another blog about a feature that I’m sure you all have been wondering about. If you’ve been using SOLIDWORKS Electrical, you know it’s a useful tool to use schematics to create harnesses in 3D automatically. However, you might be wondering how to create a standard harness drawing in 3D and exporting that back into your 2D project. And if you are, then keep reading, because that’s exactly what I’m going to discuss in this article!
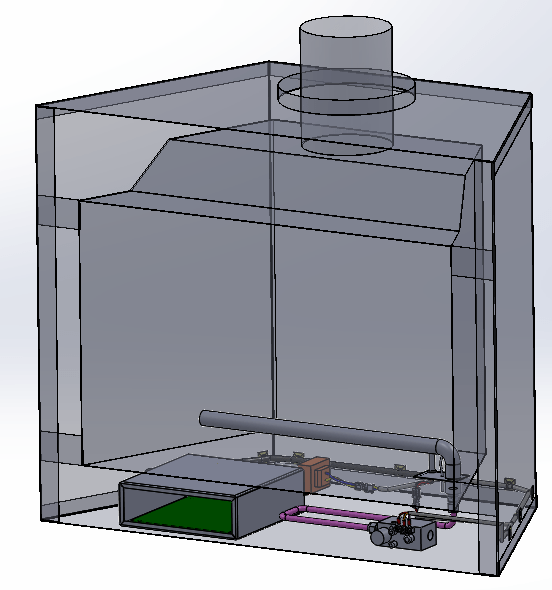
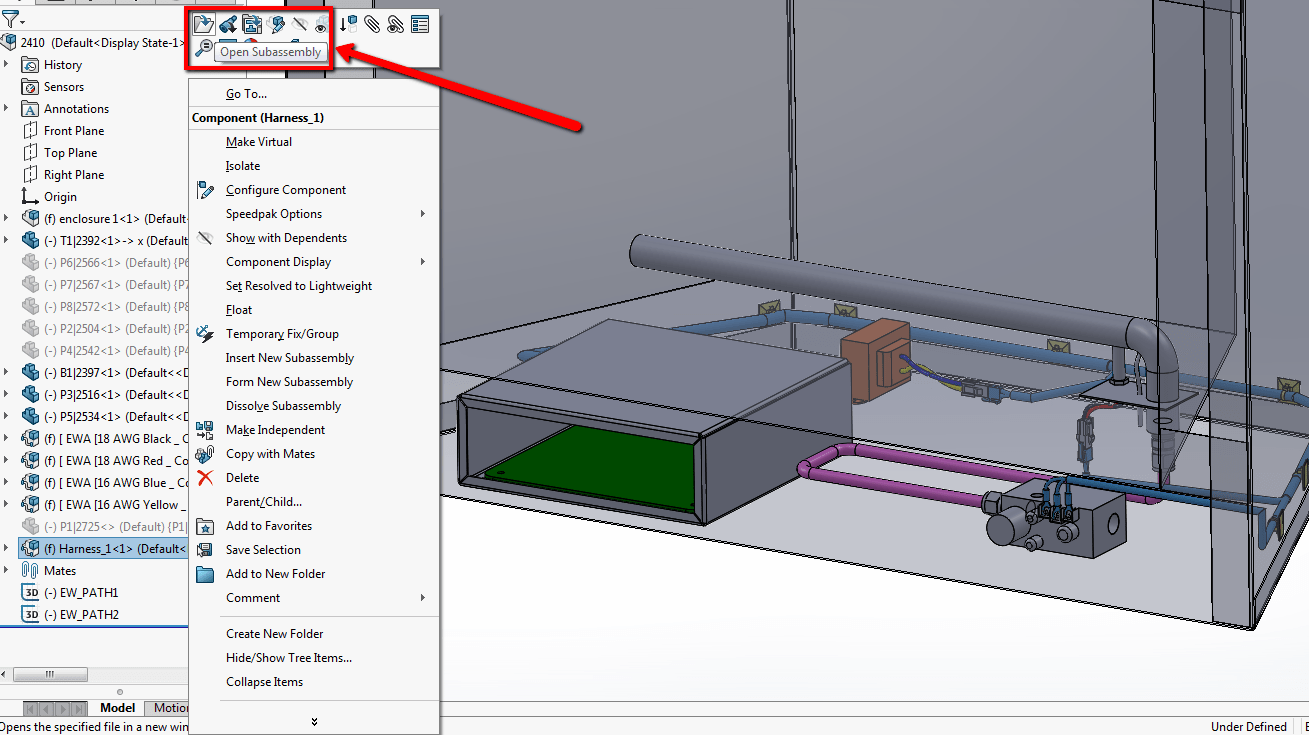
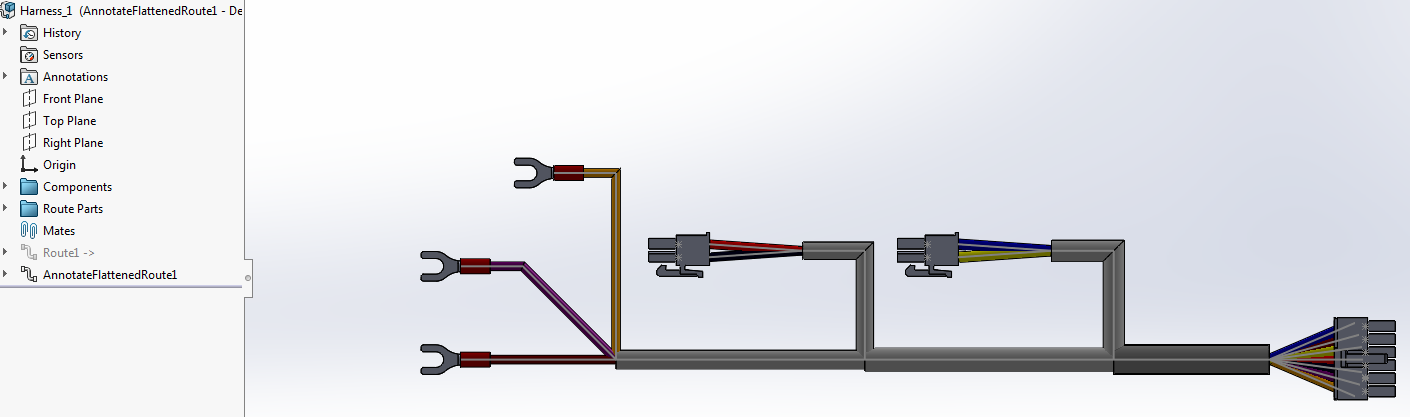
To demonstrate this, I have a model of a gas fireplace that I’ve been working on in SOLIDWORKS Electrical 3D. I’ve already routed a harness between the various electrical components, and it’s time to create a 2D drawing of the harness. To do that, the first thing I will do is to open up the harness in its own window. Just right click on it in the Feature Manager Tree and select Open Subassembly or Open Subassembly in Position.
 |
 |
To flatten the route, I’ll switch over to the Electrical Command Manager. Click Flatten Route and the property manager pops up with some options.
 |
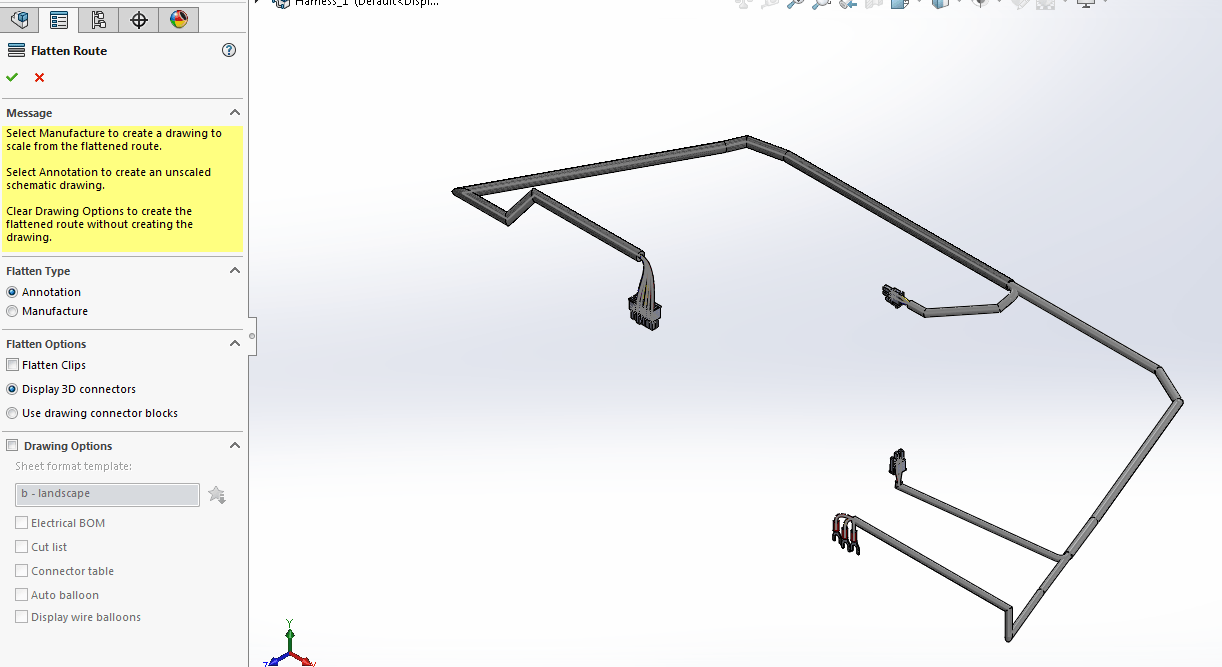 |
You can choose from 2 flatten types, Annotation and Manufacture. Annotation is a simplified, not to scale representation of the harness. Manufacturer creates a nail board representation, meaning the route is to scale, just as if someone laid it out on a piece of plywood. I’m going to focus on the Annotation option for this article, look for a future blog on the Manufacture method.
Under that are the Flatten Options. We can choose to display the connectors as 3D or as simplified 2D blocks. For the latter option, these will only show up in the drawing and not the 3D model. If you have any clips in the route, you can choose to have them move in the flattened configuration as well.
At the bottom of the window, there are the Drawing Options. Click on the box to turn that on and now you have the ability to choose the sheet template, add in a BOM, a Cut List, a Connector table and balloons. These are all options to customize your drawing, but besides the sheet format, I don’t need any of these other things because they will be in my SOLIDWORKS Electrical schematic. After I turn all of those off by clicking the box next to the name, hitting the green check will flatten the route AND create the 2D drawing. Keep in mind, you can’t turn off the Sheet format, SOLIDWORKS needs this to create the drawing.
 |
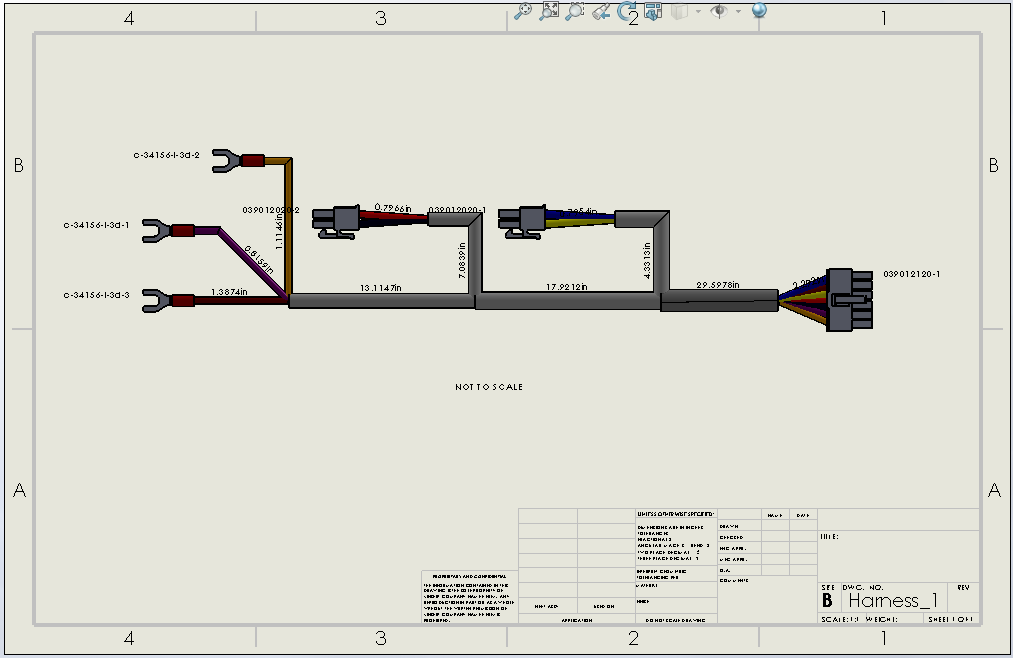 |
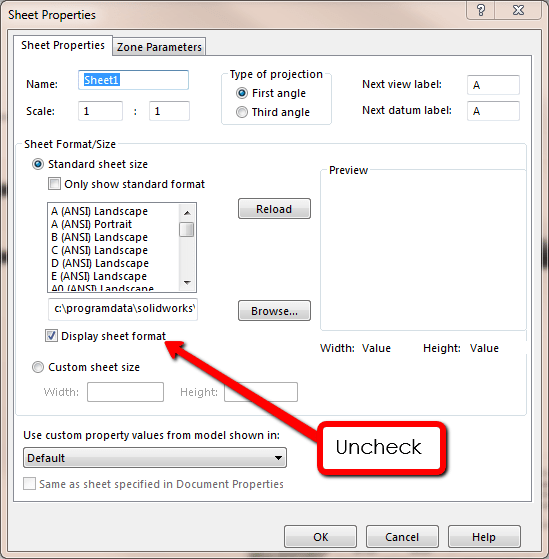
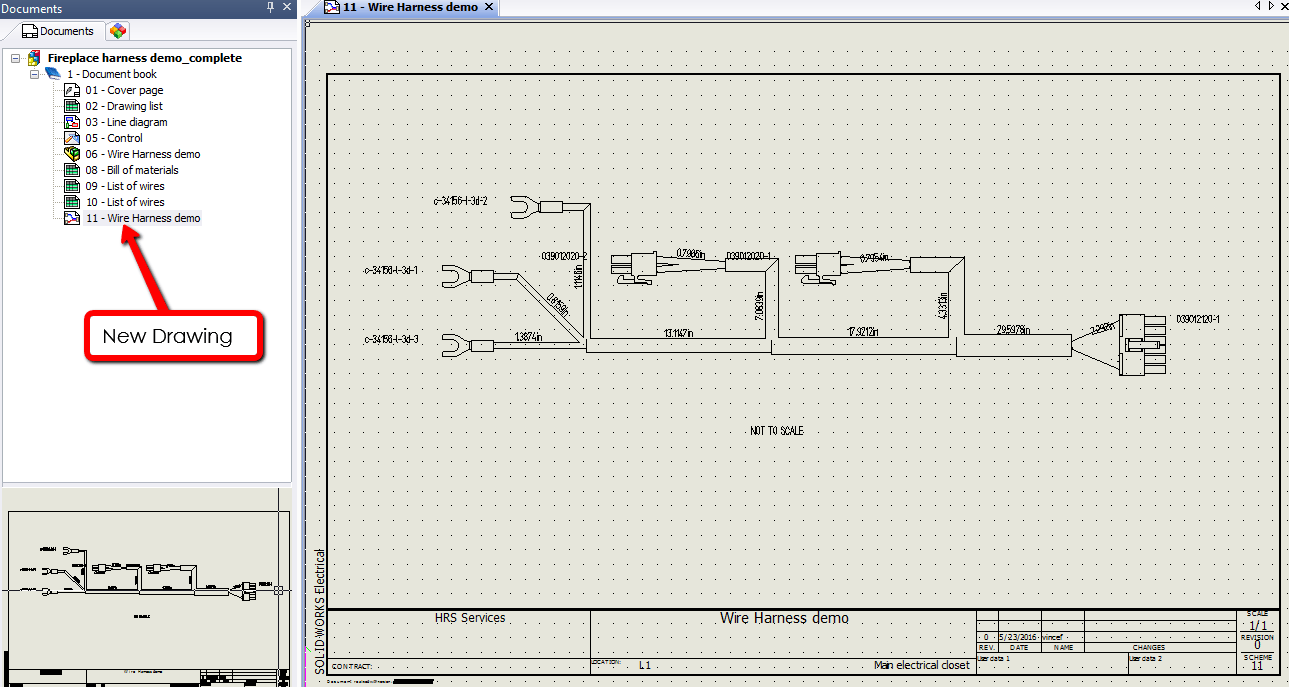
On the drawing, you can see that SOLIDWORKS has added lengths and part numbers. There’s also a note, Not to scale so that people don’t get confused and think they can print this out to make the actual harness. This looks pretty good, but how do I put this back into my SOLIDWORKS Electrical 2D schematic? It’s pretty easy, it just takes a couple of steps. The first thing I will do is to hide the sheet format because my schematics in the Electrical project already have a format. Just right-click in the Graphics Area, select Properties and uncheck Display sheet format.
 |
 |
Next, switch over to the SOLIDWORKS Electrical Drawing command manager tab and select Create Project Drawing. You might get a warning saying to save the 2D drawing, click Yes to save, and you’ll get a message saying the drawing has been created.
 |
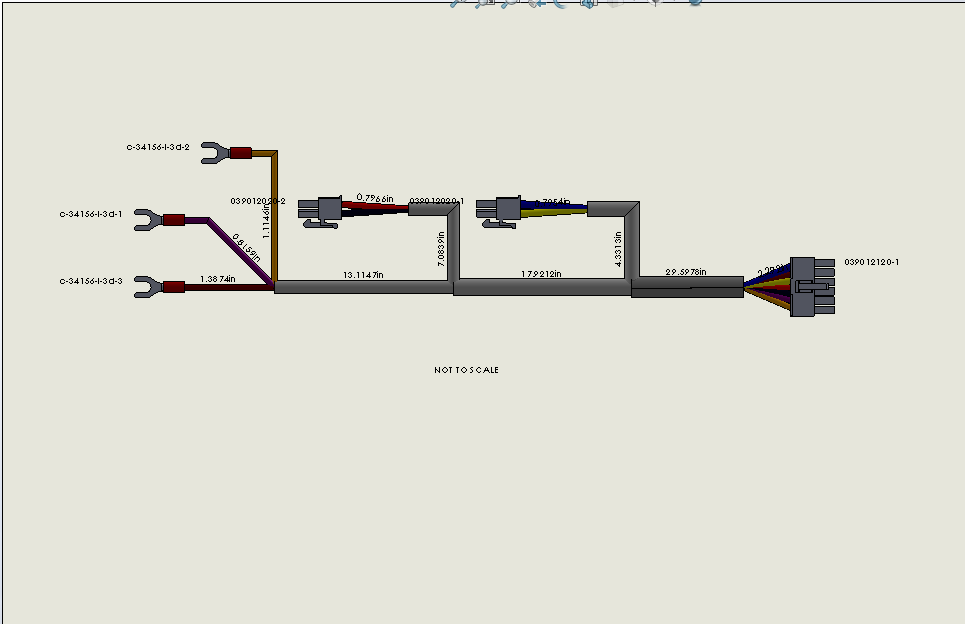
It looks like nothing happened, but when I switch over to the project 2D, a new schematic has been created, we can open it up and see our flattened harness drawing.
 |
That’s it for this blog. I hope you enjoyed it, and if so, please like it. For more information, check out our YouTube channel or contact us at Hawk Ridge Systems today. Feel free to add a comment, and thanks for reading!


I was thinking about how to make a standard bridle attracting 3D and trading that again into your 2D venture. Its an amazing article you solved my problem. I am so glad that i found your article. Its a great help..Thanks
I keep getting “There is a problem with this Route Assembly which means that is cannot be flattened” error when accepting the flatten. It never works for me.