We all know using document templates with set properties such as units and precision can save you time and ensure that you adhere to company standards, but what do you do when you have a specific set of dimensions that you want to modify? How can you make sure that the same changes are made to all the dimensions in question? That’s where the use of Styles comes in.
Using styles is one of the quickest methods for standardizing dimension callouts. Styles allow you to save dimension or annotation properties and apply these settings to other dimensions/annotations in the same document. They can also be saved and applied to other documents as well. Styles can be defined for dimensions, notes, geometric tolerances symbols, surface finish symbols, and weld symbols.
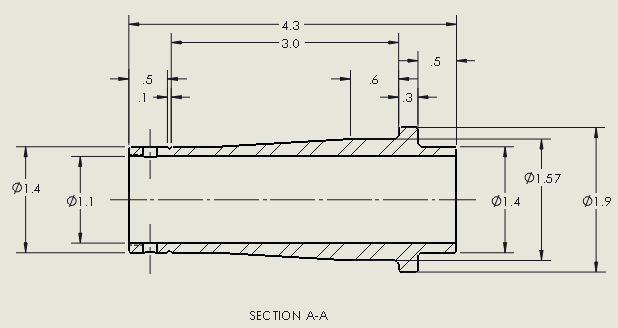
In this example, we will look at dimensions. The default precision for this drawing is set to one decimal place, with no tolerances. I will be changing the precision and adding a bilateral tolerance, which I will then save as a style.
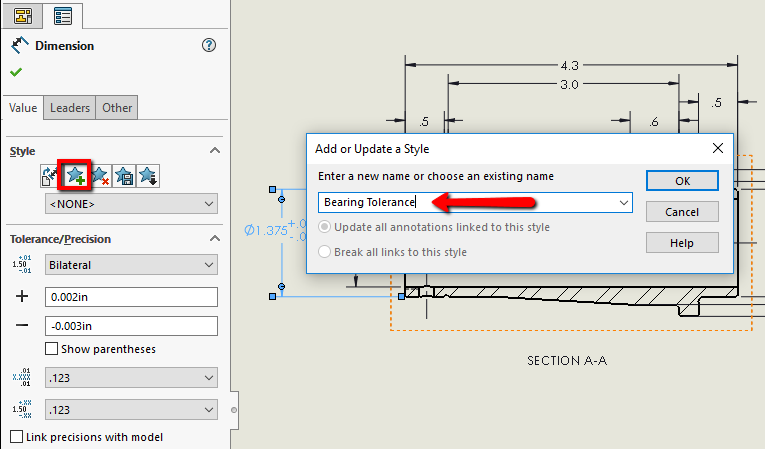
I’ll start by selecting the dimension that I want to modify. In the PropertyManager, I’ll set the desired properties: tolerance type to Bilateral, enter the desired max/min values, and the Unit and Tolerance precision.
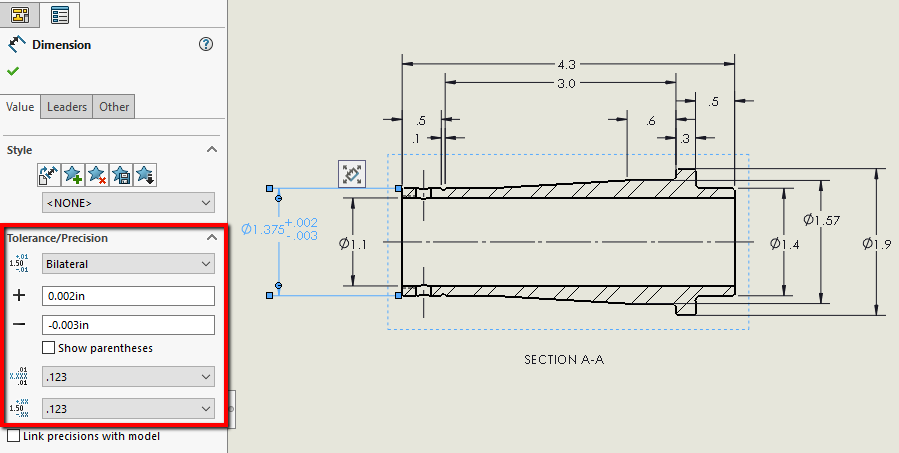
Now that the changes have been made, I can add this as a Style that captures these properties by clicking on the Add or Update a Style button in the PropertyManager. This will bring up a dialogue box where you can give it a unique name, and then click OK. The style gets created and is selectable from the drop-down menu in the PropertyManager. (Note: selecting a style from the ‘Add or Update Style’ dialogue and selecting OK will update the existing style with the settings).
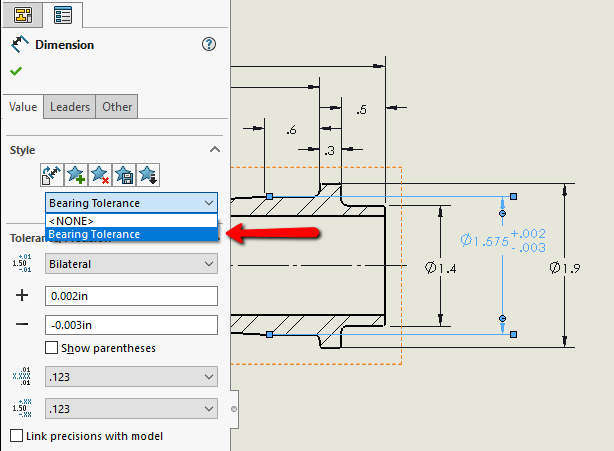
You can now apply this style to multiple dimensions in the drawing by selecting them and choosing the style from the drop-down menu.
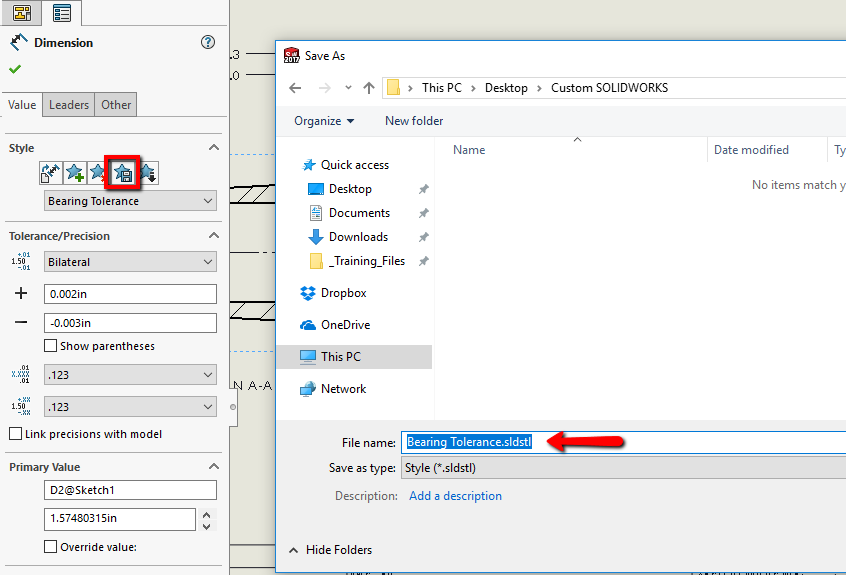
Furthermore, if you would like this style to be available in other documents as well (such as another drawing or a part), you can save the style by clicking on Save a Style in the PropertyManager and choose a folder to save the .sldstl file.
To apply the style in a different document, you can select the dimension in the file you want to modify, then click Load Style, and browse to the .sldstl file. These Styles can be shared with other users by saving them in a shared design library. Keep in mind that you can always modify a dimension’s properties, even after a style has been applied.
I hope this tip helps save you some time with your designs and helps keep dimensions consistent! For more information, check out our YouTube channel, get a SOLIDWORKS 3D CAD quote or contact us at Hawk Ridge Systems today. Thanks for reading!